Vanilla Wafer Pie Crust
A Sweet, Buttery Vanilla Crust Made for Cream Pies
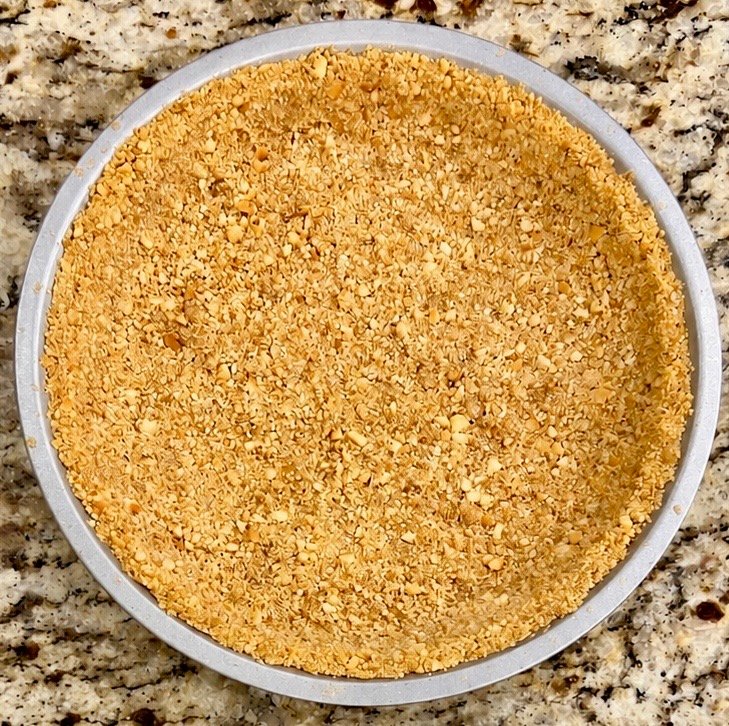
A vanilla wafer pie crust is one of my favorite alternatives to traditional graham cracker crusts, especially for cream pies. I use Nilla Wafers, melted butter, and a little brown sugar to create a crisp, buttery crust with a sweet vanilla flavor and subtle caramel notes. It’s the crust I use for my Banana Cream Pie, but it also works beautifully with vanilla pudding, cheesecake, and other chilled desserts. This easy homemade crust requires just four ingredients and can be baked or chilled before filling.
Pies That Pair Well with Vanilla Wafer Crust
Vanilla wafers have a delicate, sweet flavor that pairs particularly well with bananas, vanilla custards, and creamy fillings. The brown sugar adds a little caramel flavor without overpowering the vanilla.
- Banana Cream Pie: This is the pie that inspired my vanilla wafer crust recipe. The crisp cookie crust complements the bananas and creamy filling.
- Coconut Cream Pie: Vanilla and coconut make a natural combination, with the cookie crust adding a little texture.
- Classic Key Lime Pie: The sweet vanilla crust offers a different contrast to the tart lime filling.
Vanilla wafer crust also works well with cheesecake, chocolate pudding, and other chilled cream pies. For a more traditional toasted flavor, try my Graham Cracker Pie Crust.
Looking for more options? Explore my complete collection of Homemade Cookie Pie Crusts, including Graham Cracker, Biscoff, Oreo, and Shortbread crusts.
Man-Made Tip: Whenever possible, I measure ingredients in grams. It’s faster, more consistent, and eliminates the guesswork that comes with packed cups, heaping tablespoons, and uneven scoops. If you own a kitchen scale, now’s the time to use it.
Vanilla Wafer Pie Crust
Ingredients
Instructions
- Measure the Nilla Wafers and break them into pieces. Pulse in a food processor until finely and evenly crushed. Alternatively, place them in a sealed bag and crush with a rolling pin.
- Transfer the measured vanilla wafer crumbs to a mixing bowl. Add the melted butter, brown sugar, and salt.
- Stir until evenly combined and the mixture resembles damp sand. It should hold together when squeezed without feeling greasy.
- If the mixture seems too dry, add melted butter 1 teaspoon at a time. If too wet, add a few more crumbs.
- Transfer the mixture to a standard 9-inch pie plate.
- Using your fingers or the flat bottom of a measuring cup, press the crumbs firmly and evenly across the bottom and up the sides.
- For a baked crust:** Preheat the oven to 350°F (175°C).
- Bake for 8–10 minutes, until lightly golden and fragrant.
- Cool completely before adding the filling.
- For a no-bake crust: Refrigerate for at least 30 minutes, until firm, before filling.
- Once the crust has cooled or chilled, add your desired filling.
- Bake or refrigerate according to the filling recipe’s instructions.
Notes
Frequently Asked Questions
Absolutely. Nilla Wafers make a sweeter, more vanilla-forward crust than graham crackers. They’re especially good with Banana Cream Pie, vanilla pudding, cheesecake, and other creamy fillings.
Not necessarily, since Nilla Wafers are already sweetened. I add 2 tablespoons of light brown sugar to my recipe because it provides a subtle caramel flavor that complements the vanilla cookies. You can omit it for a less sweet crust, although the texture may change slightly.
Yes. Press the crumb mixture firmly into the pie plate and refrigerate for at least 30 minutes before adding a chilled filling. Baking it briefly at 350°F develops a toasted flavor and helps the crust hold together.
Banana Cream Pie is my favorite use for this crust. The vanilla flavor also pairs beautifully with coconut cream, vanilla custard, cheesecake, and chocolate pudding fillings.