Rose Apple Pie
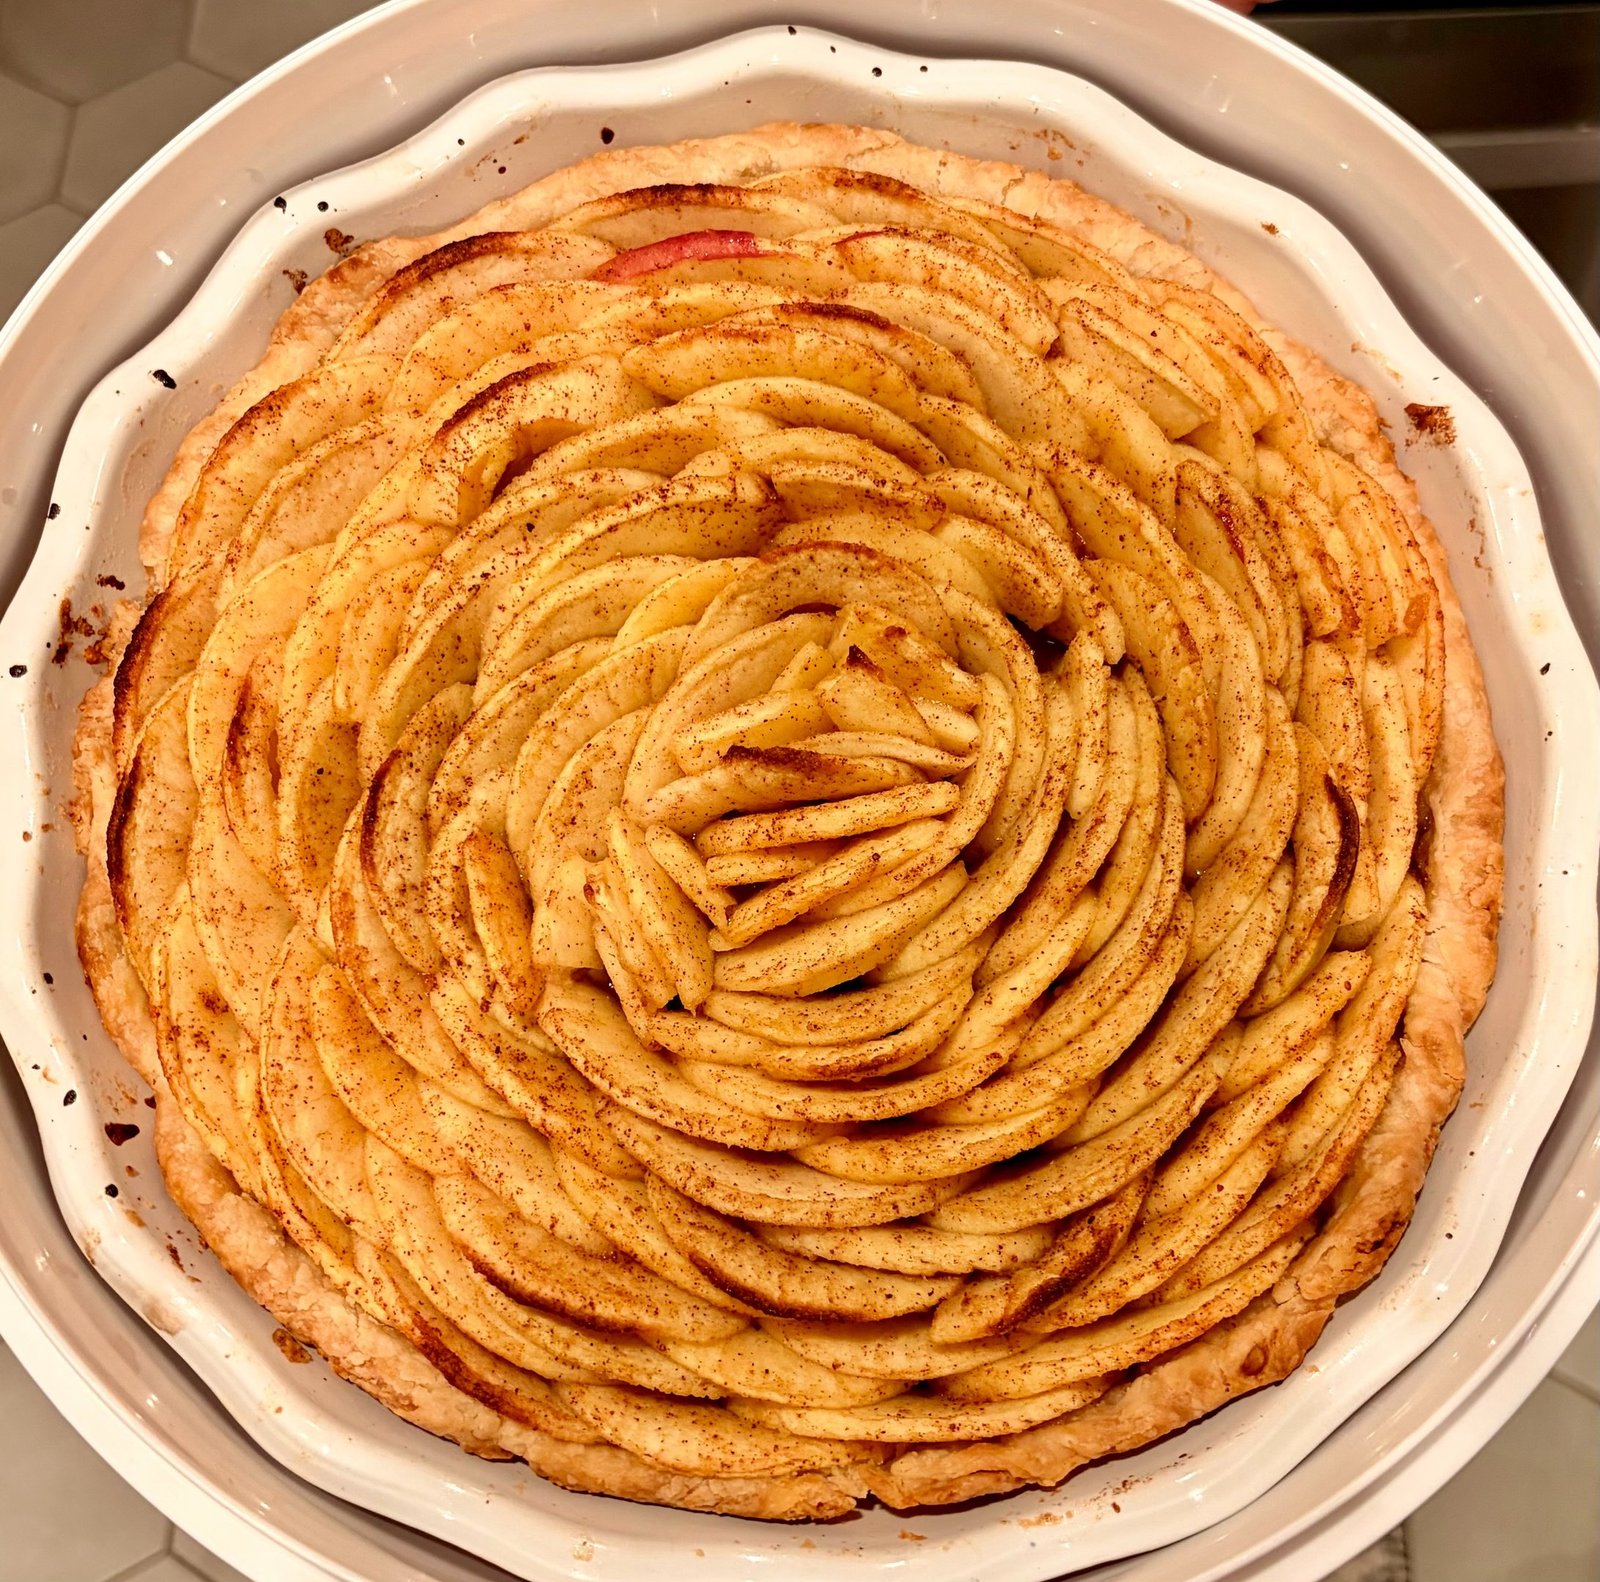
A classic apple pie with a beautiful twist.
Rose Apple Pie looks like something from a bakery window, but it’s surprisingly approachable once you know the trick. I discovered that an inexpensive apple peeler, corer, and slicer creates perfectly even apple spirals in seconds, making this impressive-looking pie much easier to assemble than you’d think.
After peeling, coring, and spiral-cutting each apple, I slice it straight down the middle to create thin, naturally curved slices. Arrange those slices in overlapping circles, working from the outside toward the center, and a beautiful rose begins to take shape. Don’t worry about getting every slice perfect. The apples soften as they bake, and small imperfections disappear.
Underneath that beautiful presentation is everything I love about homemade apple pie: my signature flaky butter-lard crust, tender apples, warm cinnamon, brown sugar, butter, and a little fresh lemon juice to brighten the filling.
It’s proof that you don’t need complicated techniques or fancy equipment to make something special. Sometimes all it takes is a simple kitchen tool and a little patience.
If you’re in Maryland, you can order this pie directly from Man-Made Pies.
Man-Made Tip: Uniform apple slices are the secret to a beautiful rose. An apple peeler, corer, and slicer creates thin, even slices that bend easily and bake evenly, making this pie much easier to assemble than it looks.
Rose Apple Pie
Ingredients
Instructions
- Use an apple peeler, corer, and slicer to peel, core, and spiral each apple. Once removed from the machine, the spiral naturally holds the shape of the apple.
- Stand each apple upright on a cutting board and slice straight down through the center from top to bottom. This creates two neat halves made up of thin, uniform slices that are perfect for arranging into the rose.
- Place the apple slices into a large gallon-size zip-top bag. Add the brown sugar, granulated sugar, flour, cornstarch, cinnamon, nutmeg, salt, lemon juice, and vanilla extract. Seal the bag, leaving a little air inside, then gently turn and shake until every apple slice is evenly coated. Avoid vigorous shaking so the slices stay intact.
- Let the apples rest for about 10 minutes.
- Transfer the seasoned apples to a large bowl and gently drizzle the melted butter over the slices. Toss lightly with your hands until evenly coated.
- Preheat the oven to 400°F (205°C).
- Beginning around the outside edge of the prepared pie crust, overlap the apple slices by about half while keeping them standing upright.
- Continue arranging concentric circles toward the center of the pie.
- As the circles become smaller, tuck the remaining slices into place until the center resembles a rosebud.
- Don’t worry if it isn’t perfect. As the apples soften during baking, small gaps and imperfections naturally disappear.
- Pour any juices remaining in the bowl evenly over the apples before baking.
- Whisk together the egg and milk, then brush the egg wash over the exposed pie crust.
- Bake at 400°F for 20 minutes.
- Reduce the oven temperature to 350°F (175°C) and continue baking for 35–45 minutes, until the apples are tender, the filling is bubbling, and the crust is deep golden brown.
- If the crust browns too quickly, loosely cover the edges with foil.
- Allow the pie to cool for at least 2 hours before slicing.
- The filling continues to thicken as the pie cools, making cleaner slices.
Notes
Frequently Asked Questions
No, but I highly recommend one. It creates thin, uniform apple spirals in seconds, making the rose pattern much easier to assemble. You can also use a mandoline or sharp knife to cut thin slices, although arranging them will take more time.
I prefer Honeycrisp for their sweetness and flavor. Combining Honeycrisp with Granny Smith adds a little tartness and creates a more balanced filling. Choose firm apples that will hold their shape during baking.
Thin, uniform slices are the key. An apple peeler, corer, and slicer produces flexible slices that naturally curve into the rose shape. Handle them gently when seasoning and arranging. If your slices are too thick or stiff, they may crack when bent.
No. This recipe starts with a chilled, unbaked pie crust. The initial 400°F baking temperature helps set the crust before the oven temperature is reduced. Baking on a preheated metal baking sheet can also help the bottom crust cook more thoroughly.
Yes. You can bake the pie a day before serving. Allow it to cool completely, then cover and refrigerate. Serve chilled, bring it closer to room temperature, or gently rewarm it before serving.
Yes. Allow the baked pie to cool completely, then wrap it tightly and freeze for up to 3 months for best quality. Thaw overnight in the refrigerator. The apples may soften slightly after freezing, so the rose pattern may not look quite as crisp as it did when freshly baked.