
Cherry Pie
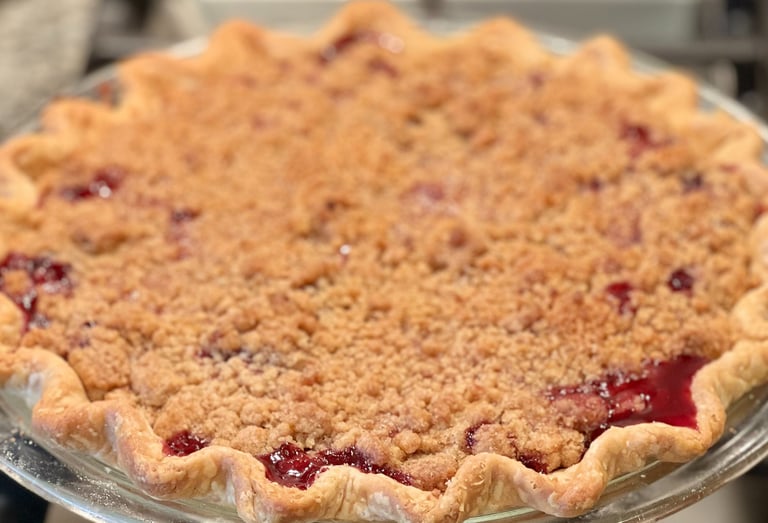
A flaky lattice-topped cherry pie made with tart cherries, reduced cherry juices, and a two-cut cherry technique that creates a filling packed with both silky sauce and whole fruit.

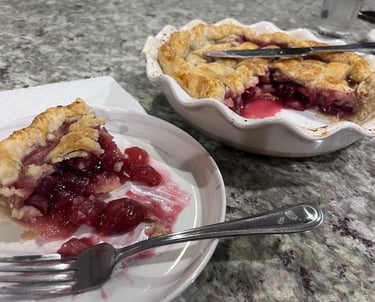
Cherry pie seems simple until you start chasing the perfect slice. Too much juice and the filling runs everywhere. Too much thickener and the filling loses the bright flavor and texture that make cherry pie so memorable.
Instead of relying on extra cornstarch, I reduce the natural cherry juices into a concentrated syrup before adding them back to the filling. I also cut half of the cherries into halves and the other half into quarters. Those two simple techniques create a filling that's thick enough to slice cleanly while still delivering plenty of juicy whole cherries in every bite.
Wrapped in a flaky homemade lattice crust, this is the cherry pie I bake when I want bold cherry flavor without sacrificing texture.

Want me to make this one for you?
If you're in Maryland, you can order this pie directly from Man-Made Pies.
Yield: 1 (9-inch) pie, 8 servings
Prep Time: 35 minutes
Bake Time: 60 to 70 minutes
Cooling Time: 3 hours
Total Time: 4 hours and 45 minutes
Ingredients
Pie Crust
1 double-crust 9-inch pie crust (or use my Signature 3:2:1 Butter-Lard Pie Crust Recipe or All-Butter Pie Crust Recipe)
Cherry Filling
900g tart cherries, pitted (about 6 cups)
150g granulated sugar (¾ cup)
22g cornstarch (3 tbsp)
2 tbsp fresh lemon juice
1 tsp vanilla extract
½ tsp ground cinnamon
⅛ tsp almond extract (optional)
1 tbsp unsalted butter, cut into small pieces
Man-Made Tip: I cut half of the cherries into halves and the other half into quarters. The smaller pieces release more juice and help build the filling, while the larger pieces stay intact, giving every slice plenty of whole cherry texture.
Egg Wash
1 large egg
1 tbsp milk
Optional
1 tbsp coarse sugar, for sprinkling
Instructions
1. Prepare the Cherries
Pit the cherries if using fresh.
Slice half of the cherries in half and quarter the remaining half.
Place the cherries in a large bowl. Add the sugar, cornstarch, lemon juice, vanilla extract, cinnamon, and almond extract (if using).
Stir gently until every cherry is evenly coated.
Let the cherries rest for 15 minutes to release their juices.
2. Make a Cherry Glaze
Strain the cherries over a bowl, reserving both the cherries and their juices.
Pour the reserved juices into a small saucepan and cook over medium heat, stirring frequently, until they reduce into a thick, glossy cherry glaze, about 5 to 7 minutes.
Remove from the heat and allow the glaze to cool slightly.
3. Assemble the Pie
Preheat the oven to 400°F (205°C). Place a baking sheet in the oven while it preheats.
Roll out the bottom crust and fit it into a 9-inch pie plate.
Spread the reserved cherries evenly into the crust.
Spoon the thickened cherry glaze evenly over the fruit, allowing it to settle between the cherries.
Dot the filling with the butter.
Top with a lattice crust or a full top crust. If using a full crust, cut several slits to vent steam.
Whisk together the egg and milk, then brush the egg wash over the crust. Sprinkle with coarse sugar, if using.
4. Bake
Place the pie on the preheated baking sheet.
Bake at 400°F (205°C) for 20 minutes.
Reduce the oven temperature to 375°F (190°C). If the crust edges are already browning quickly, briefly open the oven and cover them with a pie shield or strips of foil.
Continue baking for 40 to 50 minutes, until the crust is deep golden brown and the filling is bubbling through the center.
5. Cool
Allow the pie to cool on a wire rack for at least 3 hours before slicing.
The filling continues to set as it cools, creating cleaner slices.
Recipe Notes
Cutting the cherries into two different sizes creates a better balance of texture in every bite.
Cooking the reserved cherry juices into a glaze concentrates the flavor while creating a thick, sliceable filling without coating every cherry in excess thickener.
Tart Montmorency cherries produce the best balance of sweetness and acidity.
Allow the pie to cool completely before slicing for the cleanest presentation.
Frequently Asked Questions
Why do you cut the cherries two different ways?
Quartering half of the cherries releases more juice and helps build the filling, while the halved cherries stay more intact. The result is a pie with both a silky filling and plenty of whole fruit.
Why create a cherry glaze?
Cooking the reserved cherry juices into a thick glaze concentrates their flavor before they're spooned back over the fruit. The glaze settles between the cherries during baking, creating a rich, sliceable filling without making the fruit feel overworked or gummy.
Can I use frozen cherries?
Yes. Frozen tart cherries work very well. Thaw and drain them first, then follow the recipe as written.
Do I have to use almond extract?
No. It adds a subtle background note that complements cherries, but the pie is excellent without it.
How do I know when cherry pie is done?
The filling should be bubbling through the center or lattice openings before you remove the pie from the oven. If it's only bubbling around the edges, continue baking.
Can I freeze cherry pie?
Yes. Wrap the cooled pie tightly and freeze for up to 3 months. Thaw overnight in the refrigerator before serving.
Award-winning pie recipes
Homemade Pie Crusts, Brownies, and Bold Desserts Built From Scratch.
A curated collection of recipes I actually make, trust, and come back to.
Built one pie at a time in Baltimore.
Good pies start with good crust. Everything else is just filling.
Michael@manmadepies.com
© 2025. All rights reserved.