Ingredients
Equipment
Instructions
Cut in the Butter
- In a large mixing bowl, whisk together the flour, salt, and sugar (if using). Add the cold, cubed butter and toss to coat.
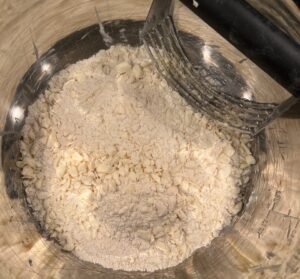
- Using a pastry cutter, sturdy fork, or your fingertips, work the cold butter into the flour until the mixture resembles coarse crumbs with pea-sized pieces of butter remaining. Those larger pieces of butter create flaky layers as they melt during baking.
Man-Made Tip: Butter softens quickly. If the dough starts feeling sticky while rolling, refrigerate it for 10 to 15 minutes before continuing.
Add the Ice-Cold Liquid
- Drizzle the ice-cold water over the flour mixture a little at a time, gently stirring with a fork after each addition.
- Stop adding liquid as soon as the dough begins to clump together when squeezed in your hand. It should look slightly shaggy rather than smooth.
- If the dough seems dry, add another teaspoon of liquid. If it becomes sticky, dust in a little more flour.
Man-Made Tip: Less mixing means a more tender crust.
Rest the Dough
- Turn the dough onto a lightly floured surface and gently press it together into a disk. Avoid kneading the dough.
- Wrap tightly in plastic wrap and refrigerate for at least 1 hour (2 hours is even better), or up to 24 hours. Chilling allows the flour to fully hydrate while firming the butter, making the dough easier to roll and helping prevent shrinkage during baking.
Roll It Out
- Lightly flour your work surface and rolling pin.
- If the dough has been refrigerated for 1 hour or longer, let it sit at room temperature for 15 to 20 minutes before rolling. The butter should still feel cold, but the dough will be more pliable and much less likely to crack.
- Starting in the center, roll outward in every direction, rotating the dough a quarter turn every few rolls to maintain a round shape.
- Continue until the dough is about ⅛ inch thick and roughly 11 to 12 inches in diameter for a standard 9-inch pie plate.
Man-Made Tip: If the dough becomes soft or sticky, refrigerate it for 10 to 15 minutes before continuing.
Fit the Pie Plate
- Carefully roll the dough around the rolling pin and unroll it over the pie plate, or gently fold it into quarters before transferring.
- Ease the dough into the bottom and sides without stretching it. Trim any excess, leaving about 1 inch of overhang, then fold the edge underneath itself and crimp as desired.
Man-Made Tip: Stretching the dough causes it to shrink during baking.
Top Your Pie
- If you're making a double-crust pie, roll out the second batch of dough just as you did the first.
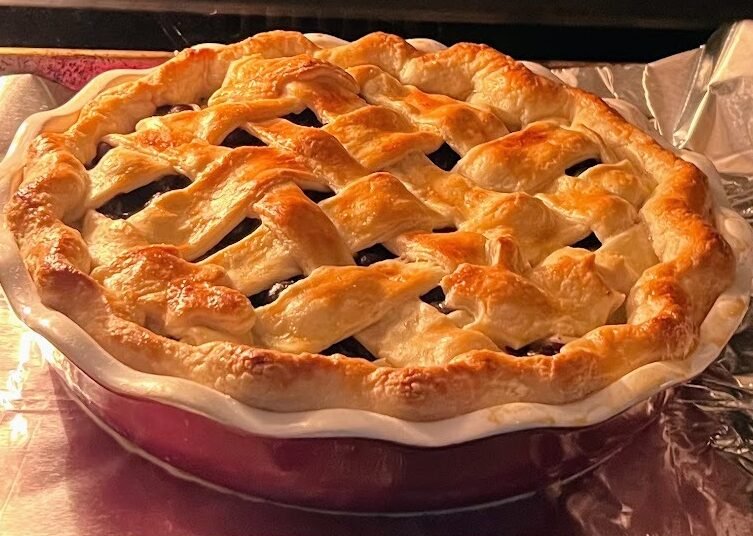
- Lattice Top: Roll the dough into a circle about 10 to 11 inches in diameter. Using a pizza cutter or sharp knife, cut ¾ to 1-inch strips and weave them over the filling to create a classic lattice. Trim the ends, fold them into the bottom crust, and crimp the edges together.
- Full Top Crust: For a traditional covered pie, lay the second crust over the filling, trim the overhang, fold the edges under, and crimp to seal. Cut several small slits in the center to allow steam to escape during baking.
Man-Made Tip: If the dough becomes soft while crimping, refrigerate it for 10 to 15 minutes before baking.
Crimp the Edges
- Once the dough is fitted into the pie plate, finish the edge using your favorite style.
- Classic Finger Crimp: Pinch the dough between your fingers to create evenly spaced fluted edges.
- Fork Crimp: Press the tines of a fork around the edge to create a simple decorative finish.
- Rope Crimp: Fold the overhang underneath itself and gently push the dough forward with your thumb to form a twisted rope.
- Rustic Edge: Fold the edge under without crimping for a more casual, homemade appearance.
- Decorative Cutouts: Use leftover dough to cut leaves, stars, or other shapes. Attach them with a little egg wash before baking.
Man-Made Tip: Brush the top crust or lattice with egg wash before baking for a beautifully golden finish.
Notes
Choosing Your Crust Quantity
- Single crust: Makes one 9-inch pie crust.
- Double crust: Makes two 9-inch crusts, enough for a top and bottom crust or two single-crust pies.
How Long Should You Chill Pie Dough?
- Good | 30 minutes: Enough to firm up the butter and make the dough easier to roll.
- Better | 1 hour: More time for the flour to hydrate and the gluten to relax, producing a more tender crust.
- Best | 2 hours: My recommendation. The dough is thoroughly chilled, easier to handle, and less likely to shrink during baking.